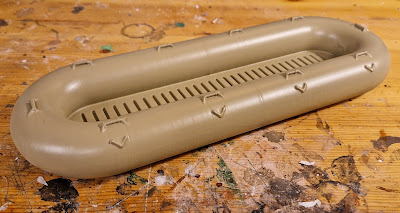
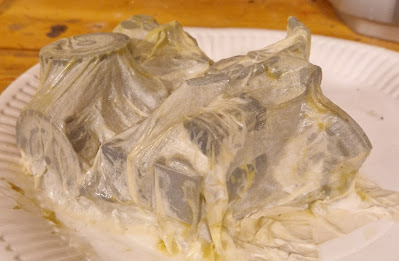
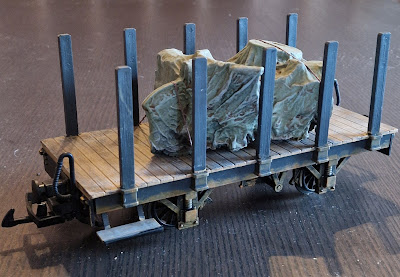
Showing posts with label garden Railway. Show all posts

Friday, May 10, 2024

Loading a ferry onto a narrow gauge train (not the other way around) - An easy model you can build

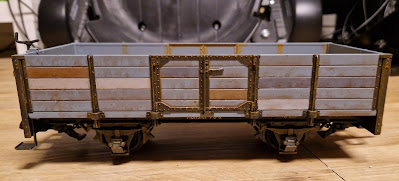
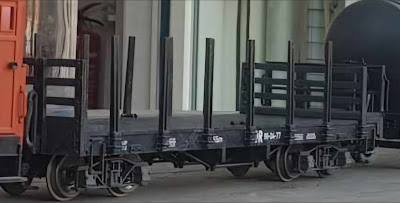
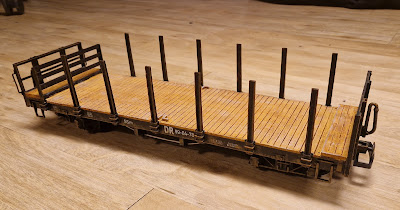
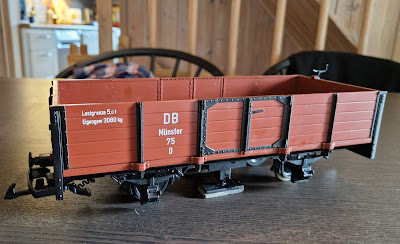
This modelling project did not actually start with a boat or ferry model, but with a railway wagon. It seems like 'Murphy's Law of Combat' also strikes when coming to modelling military railways. The LGB starter set I used for making my Heeresfeldbahn was originally a starter set for a German narrow gauge railway from the Frisian island of Wangerooge. It was a nice livery, but it didn't seem that LGB had much other rollingstock from that island railway except for those in the starter set itself. So the decision to repaint it and make it into a Heeresfeldbahn was easy. During a weekend trip to the German town of Kiel last autumn, I visited a small model railway shop there; Scharly's Lokshop. It deals mainly with second hand items, and in the shop I saw a very beautiful LGB model of an open goods-wagon from, off course, Wangerooge (!). If I'd knew that LGB had made more models from this particular railway, I would have considered not to convert the starter set in the first place. -But that was just too late now, so I ended up buying the Wangerooge-wagon anyway, just to repaint it grey so it would fit the rest of my 'ex Wangerooge  Heeresfeldbahn-livery'.

Making an easy model of a German military ferry - Flosssachfähre. Making a G-scale ferry and using it as carload for garden railways.

The Prototype

Since it was an open wagon, it would improve the look if some load could be added to it.
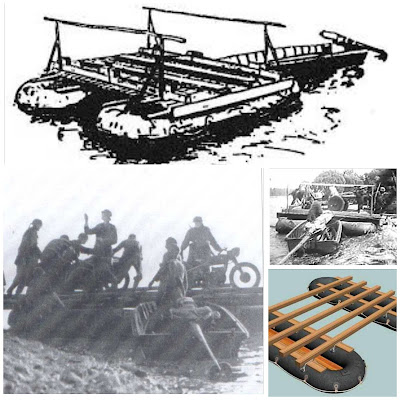
While I was searching for paint-schemes and information about the Sturmboot 39 in connection with modelling them as a load for my G-scale Heeresfeldbahn, I discovered that these Sturmboots also were used to power German military pioner ferries - Flosssackfähre, which were made up of a couple of large inflatable rubber dinghies - Grosser Flosssack 34, with wooden beams and deck between them. They could carry infantry, motorcycles and small PKWs.
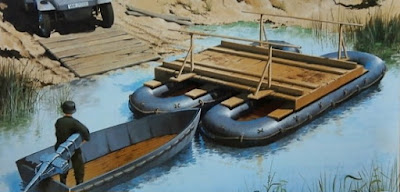
Making an easy model of a German military ferry - Flosssachfähre. Making a G-scale ferry and using it as carload for garden railways.
Boxart from Dragons very nice kit of such a ferry. Too bad for me it's only made to 1:35 scale, as I needed one in 1:19 scale

The Model

I made the Sturmboot 39 originally as a homage for my son who had recently done his service in the Norwegian Coast Guard, where he was operating fast patrol boats.

Making an easy model of a German military ferry - Flosssachfähre. Making a G-scale ferry and using it as carload for garden railways.

Now he is studying to become a 'First Mate', and last summer he took a summer-job as a 'Mariner' at a ferry in Northern Norway to finance his studies. This inspired me to make those Sturmboot 39s into the propelling part of a (pioner-) ferry; a 'Flosssackfähre' by adding the rubber dinghies and wooden beams and decking as train loads in my new wagon.

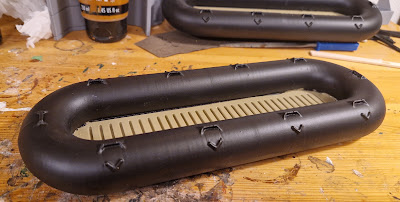
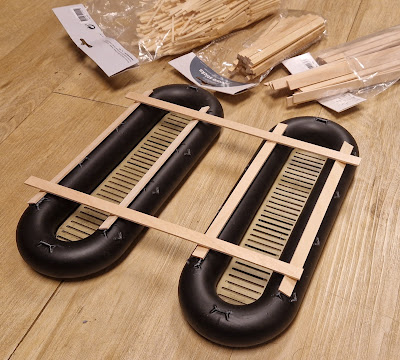
I found a free STL-file of a Grosser Flosssack 34 at Wargaming3d, which I resized to 1:19 scale. The process form 3D-printer til ready for painting can be seen in the April Workbench update. Since the originals are made in rubber, I decided to use the real thing and cote mine with black rubber as well. I used some black plasticote spray found at a car accessories shop. This worked very well to cover the layer lines in the print too (which were printed in a medium resolution).

Making an easy model of a German military ferry - Flosssachfähre. Making a G-scale ferry and using it as carload for garden railways.

Now I found out that this wouldn't fit the ex-Wangerooge wagon after all, so I purchased another flat-wagon of the same type as was in my LGB starter set and I used for the Sturmboot 39s in the first place, to use for the 2 newly printed Flosssack 34s. 

Making an easy model of a German military ferry - Flosssachfähre. Making a G-scale ferry and using it as carload for garden railways.

Since it was looking the same (all black) I painted it slightly different...

Making an easy model of a German military ferry - Flosssachfähre. Making a G-scale ferry and using it as carload for garden railways.
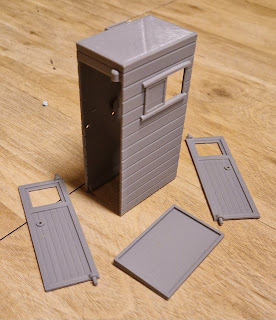
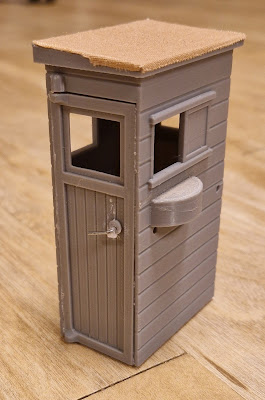
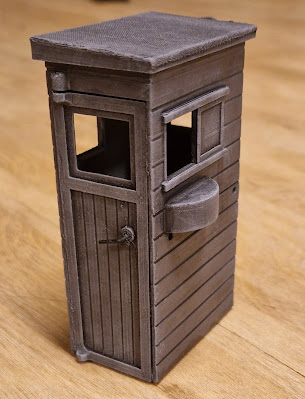
...and got fancy and downloaded and 3D-printed a brakeman's cabin to add to it.
Making an easy model of a German military ferry - Flosssachfähre. Making a G-scale ferry and using it as carload for garden railways.

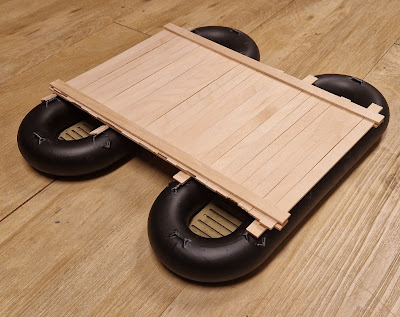
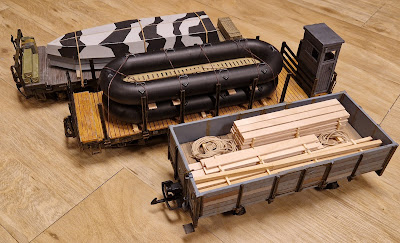
Bringing the painted flatcar, brakeman's cabin and the 2 Grosser Flosssack 34s together:

Making an easy model of a German military ferry - Flosssachfähre. Making a G-scale ferry and using it as carload for garden railways.

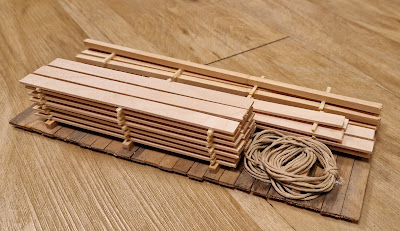
Then I could use the ex-Wangerooge wagon for the wooden beams and decking needed to make the ferry complete. First I had to mock up the ferry it self so I knew how many pieces of wood and in which lengths was needed to be cut to complete it...

Making an easy model of a German military ferry - Flosssachfähre. Making a G-scale ferry and using it as carload for garden railways.
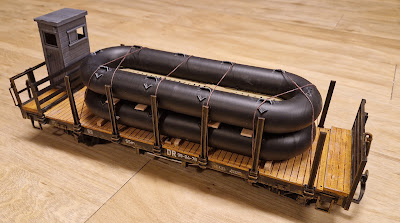
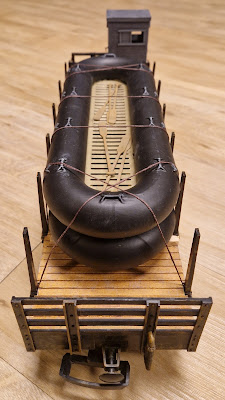
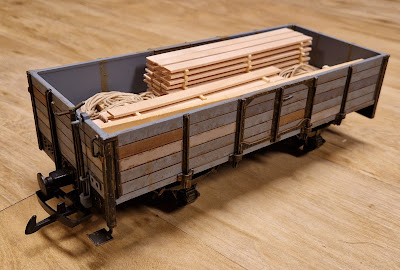
...-and then it had to be stacked and loaded to the wagon. I chose to make a removable floor to the wagon to attach the load according to my last blog post, so I can choose to use the wagon for other loads if I wish.
Making an easy model of a German military ferry - Flosssachfähre. Making a G-scale ferry and using it as carload for garden railways.

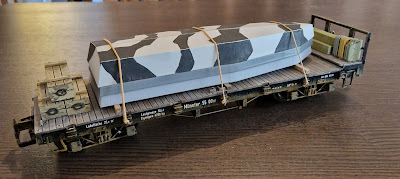
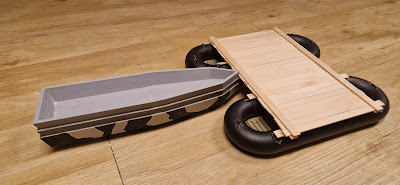
Together with my earlier 'Sturmoot 39', the 2 rubber dinghies and the wooden beams and decking makes up a complete Flosssacfähre. 

Making an easy model of a German military ferry - Flosssachfähre. Making a G-scale ferry and using it as carload for garden railways.

When the complete German military pioner ferry of the Flosssachfähre-type are loaded onto railaway wagons it looks like this:

Making an easy model of a German military ferry - Flosssachfähre. Making a G-scale ferry and using it as carload for garden railways.

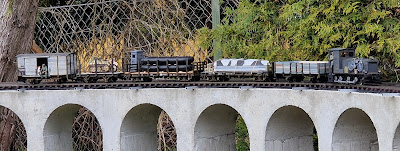
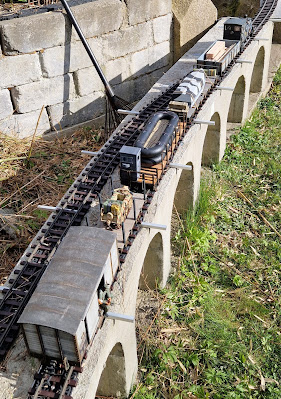
And loaded on the train 'the ferry' doesn't look so much like a ferry anymore (unless you've seen the prototype). But it shows that's possible to model a large scale car ferry and load it onto a narrow gauge train in a prototypical way. 

First run on a 'day out' (in a friend's garden as my own garden railway is temporary out of service) transporting a group of Sturmpioneren:

Making an easy model of a German military ferry - Flosssachfähre. Making a G-scale ferry and using it as carload for garden railways.

This 'military load doesn't look so offensive, neither does any of my other loads on my Heeresfeldbahn. Initially I optet for more offensive loads like armoured cars and fighting vehicles, but I've not seen pictures of such so I think my loads seems credible for a narrow gauge railway.

Friday, May 3, 2024

End of the Line - The Garden Railway Closure (!)

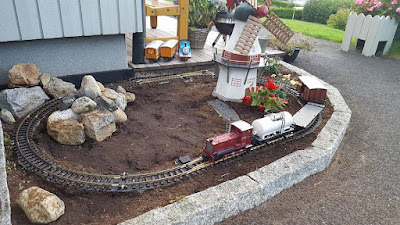
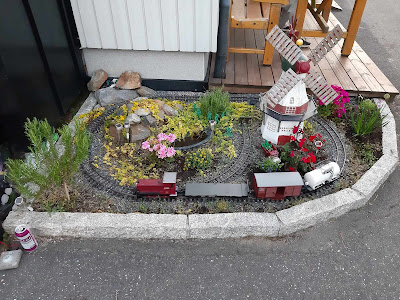
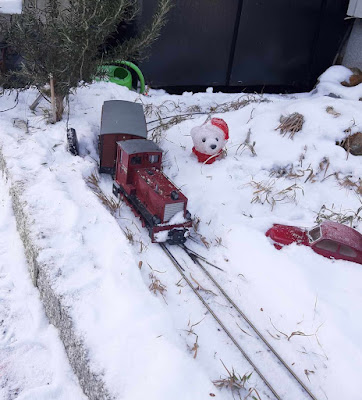
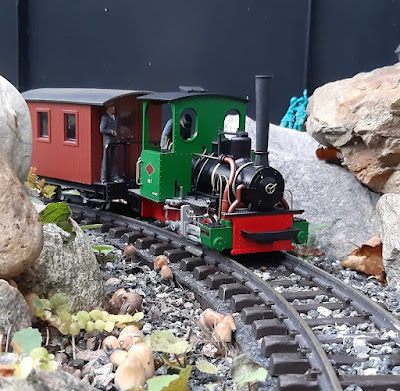
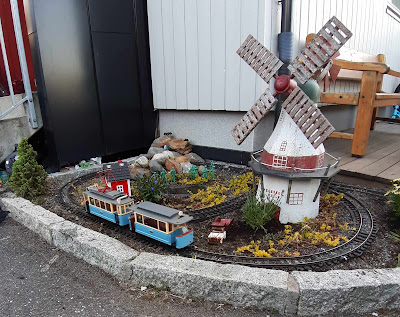
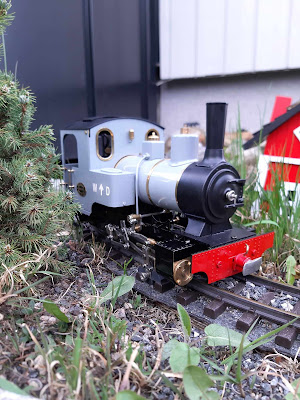
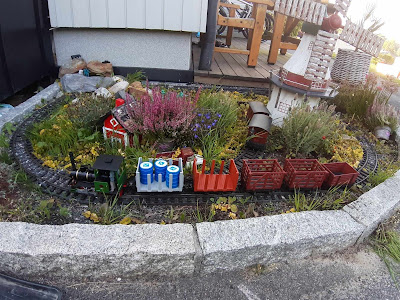
My Garden Railway is perhaps the 'smallest large-scale' garden railway in Norway. Usually by this time of year it get prepared and ready for the season, but not this year. It's been operative since 2016, but now it's  reached the 'end of the line', and it's time to shut it down...

small garden railway, smallest garden railway layout
Click photo for larger image

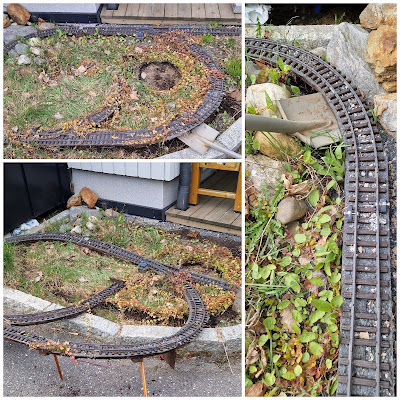
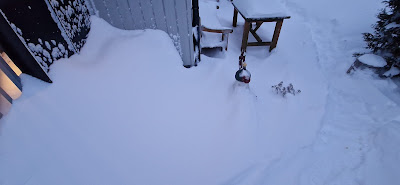
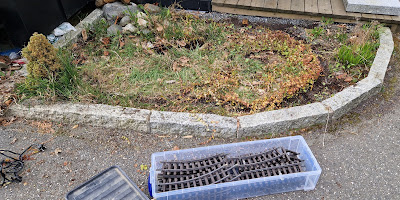
Due to required drainage work around our house, digging to change the old drainage-pipes are needed. Some of those pipes are unfortunately located in the ground below the garden railway, so it's going for a closure and the rails needs to be lifted. 

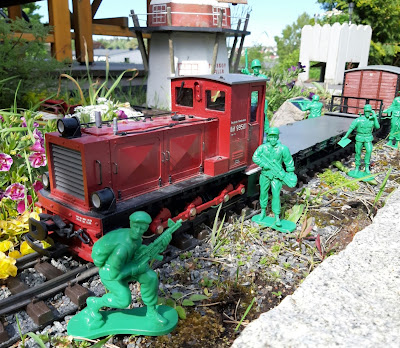
It provided great fun and good times for the whole family through it's years in service. Here is a throwback:

small garden railway, smallest garden railway layout
Click photo for larger image
small garden railway, smallest garden railway layout
Click photo for larger image
small garden railway, smallest garden railway layout
Click photo for larger image
small garden railway, smallest garden railway layout
Click photo for larger image
small garden railway, smallest garden railway layout
Click photo for larger image
small garden railway, smallest garden railway layout
Click photo for larger image
small garden railway, smallest garden railway layout
Click photo for larger image
small garden railway, smallest garden railway layout
Click photo for larger image
small garden railway, smallest garden railway layout
Click photo for larger image
small garden railway, smallest garden railway layout
Click photo for larger image
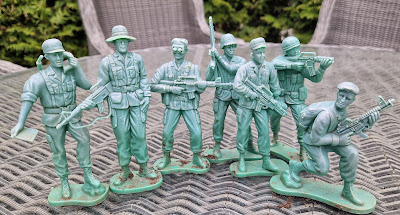
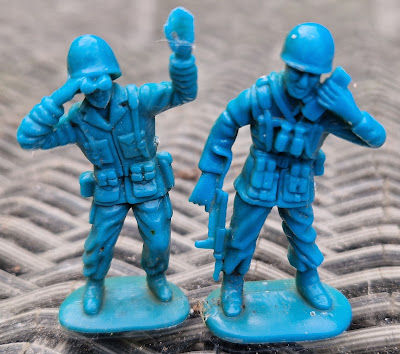
Some of the Troops did not age well since they were deployed in 2019. I guess they are considered Veterans now.
small garden railway, smallest garden railway layout
Click photo for larger image
small garden railway, smallest garden railway layout
Click photo for larger image
It's not the end of the hobby and the interests for model- and garden railways though, and I'll keep on modelling military trains in large scale.

I guess I'll just have to run my trains at my friends' Garden Railways in the meanwhile until the drainage-work here is completed and I can start rebuilding some garden railway here again.
When some doors closes, another's opens; so we'll see what kind of 'layout' in the garden the future brings. This will give space for something new eventually
small garden railway, smallest garden railway layout
Click photo for larger image

Friday, April 19, 2024

An easy modelling project to create replaceable loads to your rollingstock

By this time I have more LGB-cars than my LGB-locomotive can haul, so I actually don't need to add so many more new wagons to the rake. But sometimes, I think it would be nice to be able to carry around different loads or sometimes with no loads at all instead of being limited to permanently fixed loads or empties. Sometimes members in my MRC, Gleng Modelljernbaneklubb, arrange running-sessions on their garden railways with different themes, and then it would be nice to be able to temporary load my existing cars with a another and themed load.

To be able to change different loads between my existing LGB-wagons, I've been trying out different ways to secure my loads without permanently gluing them down, so they can be easily replaced with new ones. Here I'll show some few ways I use to temporary secure different loads to my G-scale wagons.

how to easily make replaceable loads for model railways and model railroads. LGB Heeresfeldbahn, Military G-scale trains
Click for larger image

Tacky putty

This is originally a product for hanging up posters etc. It's Tacky and can temporary lightly attach smaller objects and loads.
how to easily make replaceable loads for model railways and model railroads. LGB Heeresfeldbahn, Military G-scale trains
...-no, he did not shit himself...
Click for larger image

String

This is a waxed string for jewellery I bought in a craft shop. It can be used as a 'rope' to secure medium loads. It's simply wrapped around your load and tucked in between the stakes and stakeholders on LGB wagons. Trim with scissors for neat cuts.
how to easily make replaceable loads for model railways and model railroads. LGB Heeresfeldbahn, Military G-scale trains
Click for larger image

Elastic bands

Almost everything I've been buying at the local Dollar Store has not worked as intended. -Except for these elastic hair bands. They works great for securing larger loads. It can either be wrapped around your load and wagon unmodified, or it can be cut and have a hook added in both ends. The hooks them selves are made by just bending links from a larger chain for jewellery from the craft shop. I found inspiration for tis method in this YouTube video
how to easily make replaceable loads for model railways and model railroads. LGB Heeresfeldbahn, Military G-scale trains
Click for larger image

Chains

In the craft shop I also found chains for jewellery in different sizes, which also can be used to secure your loads.
how to easily make replaceable loads for model railways and model railroads. LGB Heeresfeldbahn, Military G-scale trains
Here the chains are combined with wheel-blocks, which is again attached with tacky putty. It's very easy to remove the carload if desired.
Click for larger image

Deck

Another way to change larger loads is to make new decks/floors for your wagons with different loads attached to them. The wooden sticks are again from the craft shop. 
how to easily make replaceable loads for model railways and model railroads. LGB Heeresfeldbahn, Military G-scale trains
Click for larger image

Does it work?

I wanted to give a friend a gift as he let's us run trains on his garden railway monthly, and thought I should bring the gift as a car-load. The load was so heavy, unstable and had such a high center of gravity that it would be challenging to secure it properly, so this would be the ultimate test if the techniques works. I had to use almost all og them; I 3D-printed a cradle for the bottle and attached the cradle to the wagon with tacky putty. The bottle it self was secured with both strings and elastic hair bands with hooks. It wouldn't look so good if the gift fell off and broke, so I think this is the proof that this works and will secure your loads too without permanently fixing them.
how to easily make replaceable loads for model railways and model railroads. LGB Heeresfeldbahn, Military G-scale trains
Click for larger image

Monday, April 1, 2024

An April Workbench update - Bombs Away! (Mostly 3D-prints)

As I've been away for almost a month there hasn't been much time for wargaming, modelling or to generate so many new modelling-projects for April. Now I'm back again, so I'm slowly starting to get something on the workbench again by preparing new modelling-projects by firstly making parts for them on the 3D-printer.

Workbench updates on The Hobby Blog for Model railways, Wargaming and Military modelling. Creating an ape army

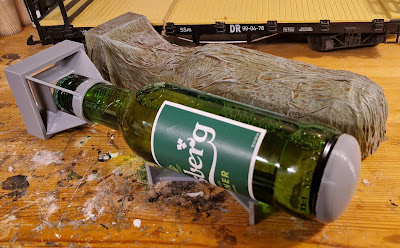
A friend and a member of my MRC was inviting other friends and members for a running-session on his garden railway this Easter, and I wanted to give him something back and an item for an 'Easter egg hunt' in his own garden and within my rake. Not making the gift too obvious it needed to be camouflaged into something that could be loaded on my military garden trains. Some few more pieces were 3D-printed. 

Workbench updates on The Hobby Blog for Model railways, Wargaming and Military modelling. Creating an ape army

Assembled on a bottle of beer it becomes more obvious what kind of load I'm turning the gift into. Bottles of beer are usually best served cold, and they have a shape that can vaguely resembles grenades. That's why I usually just call them "Kalde Granater", which would translate into something like "Cold Grenades", and is a Norwegian jargon for practicing grenades. Despite being an aerial bomb, considering the scale, this is pretty much literally a "Kald Granat" I think.

Workbench updates on The Hobby Blog for Model railways, Wargaming and Military modelling. Creating an ape army
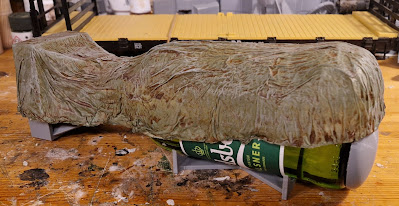
To make it look like a load which belongs in a military train it needed some further cover. I decided to use the same technique I used when Covering a model not looking so good by adding tarpaulin to it.
Workbench updates on The Hobby Blog for Model railways, Wargaming and Military modelling. Creating an ape army
I used gladpack between the bottle and tissue-paper when adding the diluted pva glue, so the tarpaulin could easily be removed from the bottle again and uncover the real load. It lifts of easily as a lid and can be reused several times.
Workbench updates on The Hobby Blog for Model railways, Wargaming and Military modelling. Creating an ape army
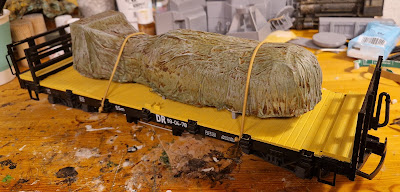
Mounted on flatcar I think this looks pretty acceptable. Keeping in mind that the railcar is 1:19 scale, this must be a really big aerial bomb. 
Workbench updates on The Hobby Blog for Model railways, Wargaming and Military modelling. Creating an ape army
 
Workbench updates on The Hobby Blog for Model railways, Wargaming and Military modelling. Creating an ape army

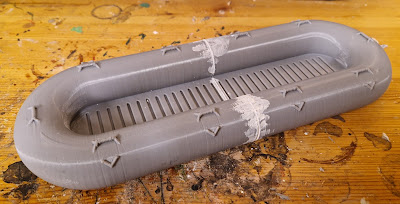
This is another 'project' I've recently printed currently working on, and shows the different stages from a 3D-printed model into an assembled and ready for paint:

Workbench updates on The Hobby Blog for Model railways, Wargaming and Military modelling. Creating an ape army
Some models needs to be divided and printed in smaller parts due to my 3D-printer which limits the maximum building size to 15×15×15 cm

Workbench updates on The Hobby Blog for Model railways, Wargaming and Military modelling. Creating an ape army
They needs to be removed from the raft (base) and be cleaned for supports. Then I dryfit the parts to see that they fits each other and adjust if necessary 

Workbench updates on The Hobby Blog for Model railways, Wargaming and Military modelling. Creating an ape army
I use CA-glue to attach the parts together. When fully cured I use filler in the cracks and sand them...

Workbench updates on The Hobby Blog for Model railways, Wargaming and Military modelling. Creating an ape army
...To a smooth finish. This model is printed to a 'standard' resolution and have visible print lines. If you want to remove them you can keep on sanding the model...

Workbench updates on The Hobby Blog for Model railways, Wargaming and Military modelling. Creating an ape army
...or use car filler from a rattle can. This is how smooth it gets with 3 layers. You can sand between the layers, but I didn't do so, and like how it turned out.

Due to work anf 'every day life' this project is still ongoing, and will return in a future blogpost when ready.


Please follow for updates

Since Alan from  The Duchy of Tradgardland showed his 'workbench clutter', I was inspired to show some of mine and reveal a hint or two of what to expect in this blog in the future...

Workbench updates on The Hobby Blog for Model

Wednesday, March 13, 2024

Military trains in large scale hitting the news

I'm a subscriber to Norway's only model railway magazine called 'Mj-Bladet' (simply translated into 'The Model Railway Magazine'),  which have 4 editions a year.

When I receive a copy I usually sits down, relaxing with a cup of coffee and enjoys the issue.

My military G scale trains on print in Norway's only model railway magazine
When receiving the latest issue today, I was surprised to see this large photo of my large scale military trains, which I has covered in this blog, almost making it to the middle pages too.
My military G scale trains on print in Norway's only model railway magazine

This was a very nice surprise to see my work from this blog at print and published.

Friday, March 8, 2024

A LGB Toy Train wagon + salvages for the 'scrap box' = Another Heeresfeldbahn military load going to the front

Making a tarpaulin load for model railways. a LGB wagon turnes into a G-scale military railway, heeresfeldbahn.
Click for larger image

One of my other interests other than the military modelling, wargaming and railway modelling is riding my motorcycle. I'm not only riding it a lot just for commuting to work (60 km away), but for recreational rides as well. But motorcycles are a seasonal thing in Norway, as we have long, cold and snowy winters where running conditions are bad or non existent. So when I had to park my motorcycle for the winter in October, I said that when "when one mc-season ends, another one starts..." as I had a couple of indoor motorcycle modelling projects on my workbench for the winter:

Making a tarpaulin load for model railways. a LGB wagon turnes into a G-scale military railway, heeresfeldbahn.
Click for larger image

The plan was to make a Kettenkrad and a BMW motorcycle with sidecar on my 3D-printer as military loads for 2 flatcars I was going to use for my G-scale Heeresfeldbahn. The Kettenkrad-kit turned out just fine, but the motorcycle with the sidecar did not look good when upscaled and 3D-printed on my printer. Both of them was originally made to 28mm scale as wargame items, but only the Kettenkrad looked acceptable when scaled up to 1:19 scale. The sidecar-motorcycle didn't print well in my 3D-printer and looked so bad and crude that I finally replaced it with a 1:18 scale diecast BMW model I was able to get cheap instead. I was just going to throw away the parts for the 3D-printed one, but somehow I just kept them laying around on my workbench for a while as I could use them for paint tests etc.

Making a tarpaulin load for model railways. a LGB wagon turnes into a G-scale military railway, heeresfeldbahn.
The original motorcycle I 3D-printed, but decided not to use.
Click for larger image

Making a tarpaulin load for model railways. a LGB wagon turnes into a G-scale military railway, heeresfeldbahn.
I found this 1:18 scale ready made diecast model instead, which looked the part except for the postwar windscreen and seat. It would be easier to fix those rather than making the 3D-printed model presentable 
Click for larger image

About the same time I went on a trip with my MRC to a model railway exhibition in Germany, where I ended up buying another colorfull LGB flat-wagon, which I could use in my growing Heeresfeldbahn rake:
Making a tarpaulin load for model railways. a LGB wagon turnes into a G-scale military railway, heeresfeldbahn.
Click for larger image

This wagon was going to need a load to make it look more interesting. After seeing a video on YouTube on how to make tarpaulin loads, I was curious to try out the technique my self, and was happy that I didn't throw away the parts for the bad looking 3D-printed BMW motorcycle with sidecar.  It would work as a testpiece for the tarpaulin-technique, as it was ruined anyway. Now I could try to cover up the mistakes literally. 
Making a tarpaulin load

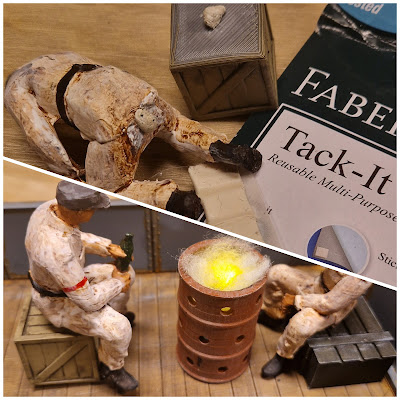
After assembling the motorcycle-model I didn't care to paint it. I just covered it with a sheet of regular tissue-paper (3 layers), and soaked it with diluted PVA-glue (close to 50:50 ratio) using a broad paintbrush to push it into crevices. I started on the highest part of the model, working downwards to the lower parts. I got a couple of rift and tears in the soaked paper, which I just patched up with small tissue- paper pieces and gave them the same treatment, and they blended in perfectly.
Making a tarpaulin load for model railways. a LGB wagon turnes into a G-scale military railway, heeresfeldbahn.
Click for larger image
Making a tarpaulin load for model railways. a LGB wagon turnes into a G-scale military railway, heeresfeldbahn.
Click for larger image

I let the diluted PVA-glue dry until the next day. When I checked it the tissue-paper had turned into a hard shell, but still it felt kind a little fragile. As I was going to use it outside under different weather conditions, I wanted it to be much sturdier so it wouldn't dissolve in rain or snow. To make it harder and sturdier, I gave i 3 coats of ModPodge, which I have good experience from using it as a sealer for wargaming miniatures.
Making a tarpaulin load for model railways. a LGB wagon turnes into a G-scale military railway, heeresfeldbahn.
Click for larger image

Even if ModPodge include som kind of Vinyl, I wanted it to be sturdier against soaking, so I gave it a couple of layers of varnish as well. By now it didn't feel so fragile anymore. 

Next it could be painted:
Making a tarpaulin load for model railways. a LGB wagon turnes into a G-scale military railway, heeresfeldbahn.
Click for larger image

A wash and some drybrushing really brings out the 'details':
Making a tarpaulin load for model railways. a LGB wagon turnes into a G-scale military railway, heeresfeldbahn.
Click for larger image

-And finally placed on the (repainted) flatcar. The flatcar was simply painted 'Panzer Grey' with a rattlecan, and drybushed withe some brown acrylics.
Making a tarpaulin load for model railways. a LGB wagon turnes into a G-scale military railway, heeresfeldbahn.
Click for larger image
Making a tarpaulin load for model railways. a LGB wagon turnes into a G-scale military railway, heeresfeldbahn.
Click for larger image

That motorcycle looks much better now hidden  under a tarpaulin. Throw away nothing, your scrap can be hidden under tarpaulin and be uses as loads or terrain-pieces in wargaming.

This was a fun and quick build and made me feel confident to make more such tarpaulin loads in the future. Just by following the instructions from the YouTube video, this technique worked the first time. Have a try for your self. 

Did I mention that I like motorcycles?
Making a tarpaulin load for model railways. a LGB wagon turnes into a G-scale military railway, heeresfeldbahn.
Click for larger image

My LGB Heeresfeldbahn rake so far:
Making a tarpaulin load for model railways. a LGB wagon turnes into a G-scale military railway, heeresfeldbahn.
Click for larger image


You may also be interested in: